An Idiot's Guide To Preparing A Manuscript
For those who are just here to read, a manuscript is an authors typed or handwritten completed work that can be sent off to publishers, agents, magazines etc. As we all know, I've been preparing my manuscript to be sent off and I wish I didn't have to work this all out myself. Hence, why I made this guide.
It doesn't matter if you are starting to write or have just finished, you want to make sure you have the basics tied down:
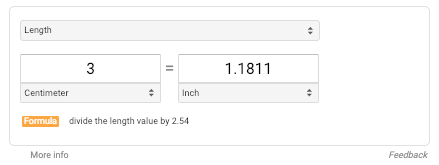
1. The margins. Now, you shouldn’t need to worry about margin size. Why? Margins should be 3cm, which translates to about an inch… the normal setting for Google Doc files.
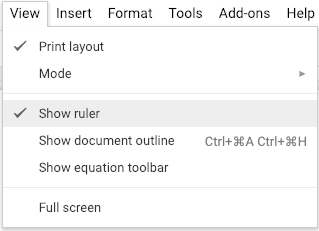
Even if you changed the margins to something else, there’s a quick fix: open the “View” menu, and choose “Show Ruler.” Manually adjust the arrows on the ruler back to the proper margin setting:
![]()
OR, a simple way to set your page up especially if you can't be bothered with additional steps is to head to "File" then "Page Setupt" to check and change your margin size.
3. Font: type, size, and color. Google Docs will automatically put all your documents in the font Arial which is perfectly fine for your manuscript. In general, your writing should be in any of the following fonts: Arial, Courier or Times New Roman.
But what's the difference? Courier and Times New Roman are both serif fonts that are widely used by many publishers and newspapers as they show class and quality wheras Arial is a sans-serif font (without serifs) which means that the font is clean and modern looking,
SO, hit one of the options anyway, just to be safe. If you ever pasted any text – quotes or straight up plagarism – they may have an improper font which you'll have to change.
There are exceptions to this rule. For example: an “insert”, those short clippings meant to resemble handwritten notes or articles, can be different. Still, you might want to use an accepted fonts until the manuscript has been bought.

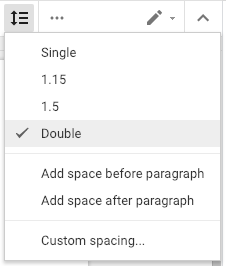
Title Page
The all-important title page. Now that your manuscript settings are in order, you’re prepared to tackle the beast! Let’s continue, going top to bottom:
1. Place agent details at the top left. When you start sending to publishers, this lets them know which agency represents your work. Or, maybe you're like me and braving it without one, in this case I put my own details.
2. The Middle: title, “By”, your name, and word count rounded to the nearest hundred. Here’s an example:
Champagne Problems
By:
Samantha McPhillips
Approx. 92,800 words
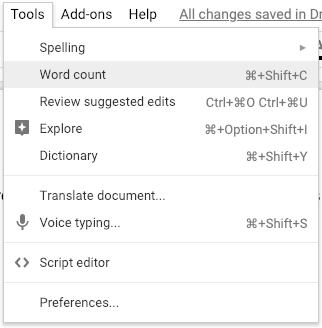
(To find Word Count, head into the “Tools” menu. Or, if using a Mac, hit “Command ⌘-Shift-C” which can be used to find the word count of a highlighted area.)
3. Place contact info at the bottom right. I recommend: your name, your email, your phone number. If the manuscript was printed, your home address might be a good idea.
4. Copyright info… isn’t necessary. But if you want to include it, double-click the lower 1-inch margin of your Google Document. This will activate the footer section.
The Body
Exporting
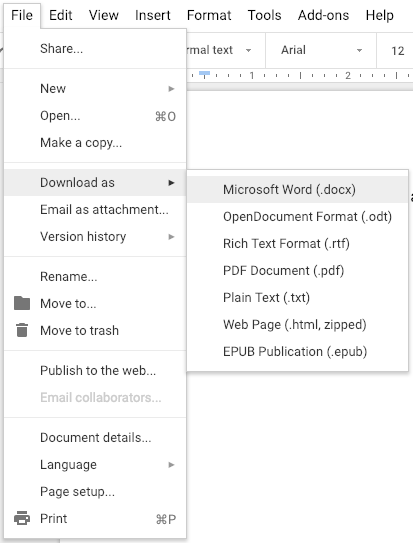
Once all else has been completed, remember that Google Documents can be saved in a huge range of types with the “File” menu. If you need a Word Document, PDF, or webpage (seriously), there’s an option just a click away!
Congratulations
There are many points along the path of novel writing that bring an immense feeling of joy: the completion of a draft, the conclusion of an edit, the sending of query letters. Crafting a fine-looking manuscript for submissions should come with that same sense of pride. I hope you enjoy the result: proper formatting is like the bow on a well-packaged present!


Comments
Post a Comment
Thanks for getting this far, penny for your thoughts?